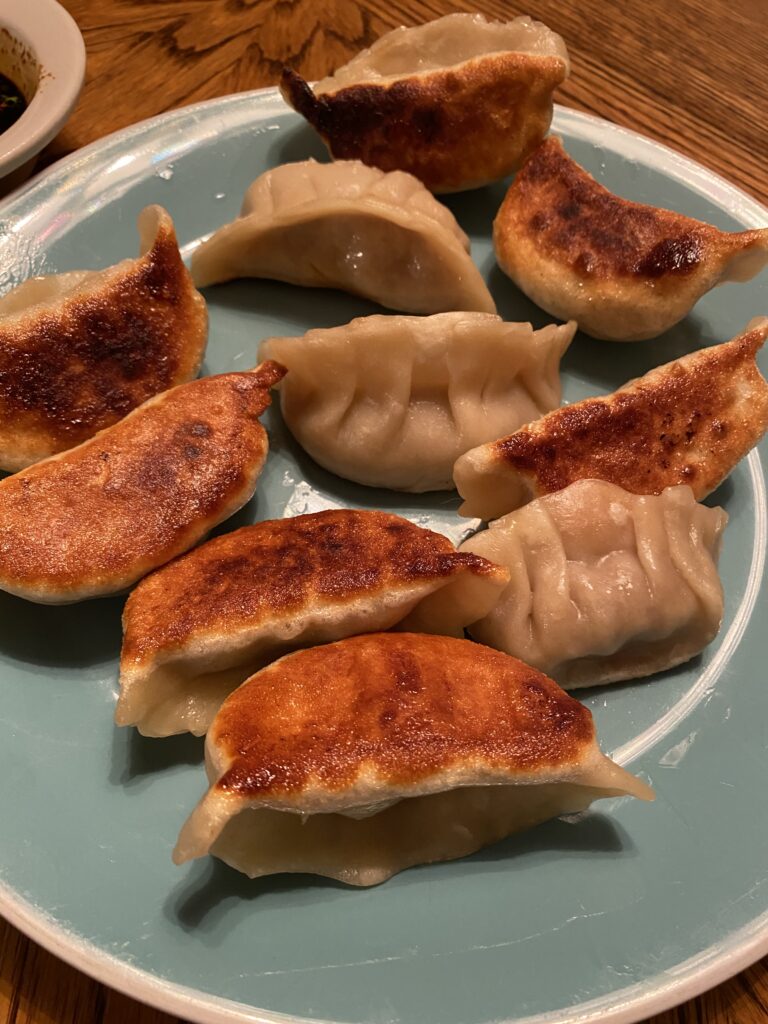
A plate full of fresh homemade Peking Ravioli
What Even are Peking Ravioli?
In Boston and its surrounding suburbs, Peking Ravioli are a staple dumpling appetizer at every Chinese food restaurant. I was introduced to them by a friend in high school and have ordered them at every opportunity since. Growing up, my family would get take out on occasion; when we got Chinese we rarely ever deviated from the exact same order. Was your family the same way, or were you more adventurous, ordering different things every time? I have very clear memories of who introduced me to things my family never ordered, things that are now part of my usual order. I often wonder if that delayed introduction to variety is why I’m so adventurous now. I still have favorite dishes I get every time, but as a family we usually leave room to have a wildcard dish in every order so that we can try new things.
In any case, I wasn’t aware that Peking Ravioli were a totally regional dish until I was living in The San Francisco Bay Area and couldn’t find them anywhere! Have you noticed that about a food you grew up eating, thinking you could find anywhere, only to realize it was regional? These delightful pockets of flavor are different from the more ubiquitous “pan fried dumpling” or “potsticker” in that they are significantly larger, the wrapper is thicker, more doughy and chewy, and the savory filling has absolutely no cabbage, which might be why I like them so much- I have never been a fan of cooked cabbage.
My favorite restaurant for these is a now-permanently-closed takeout-only spot called Tiki In. This recipe began as an attempt to copycat their version of this absolute banger must-try dish, and if anyone in the Greater Boston Area who remembers Tiki In’s Peking Ravioli tries this recipe, I welcome your feedback with open arms.
When I was researching Peking Ravioli recipes, I learned a little Peking Ravioli history. Joyce Chen, a “celebrity chef” in Cambridge, MA in the 1950s, coined the name for her menu to appeal to Boston’s large Italian population, and to convey to them that these dumplings were similar to Italian ravioli in that they are both meat-filled pockets of dough.
How Peking Ravioli are Made
The Wrappers
Since the wrapper is an important and distinguishing component of this unique food, I make the wrapper dough myself. The good news is the dough is only three ingredients and one of them is water. The other two ingredients are flour and salt – easy peasy, pantry staples! The downside is that it takes a little time and planning ahead as the dough requires an hour of rest time in the fridge for the gluten to develop, and a little bit of muscle to knead and then later roll out into circles. I make the wrapper dough first, let it rest in a quart-size plastic baggie, and make the filling when I’m ready to put them together.
Although part of me wishes I could pause time or move at hyperspeed like Quicksilver to get this part done without spending time on it, most of me really enjoys the process. It feels like an art. I cut the dough into chunks with a metal dough scraper and use a kitchen scale to make sure they’re all portioned equally (25g each is my sweet spot) , keeping the bulk of the dough zipped inside the quart-size baggie so it doesn’t dry out. One at a time, I roll the portioned dough into a sphere, flatten it into a pancake with the bottom of a glass, then roll it out to about a 4″ diameter with a small rolling pin. I use a fried egg form as a 4″ circle template to measure the wrappers to ensure they’re rolled out to a mostly uniform size.
An alternative method would be to roll a big chunk of the dough out thin, and then use a 4″ circle biscuit or cookie cutter to cut each wrapper, but the downside is that you won’t necessarily have evenly portioned wrappers, the dough dries out faster, and it becomes harder to reroll to make more wrappers out of the leftover dough. Cutting them and rolling them out individually ensures they’re more uniform in amount, there’s less waste, and keeps the dough tacky enough that you won’t need to use anything to “glue” the dumplings shut.
The Filling
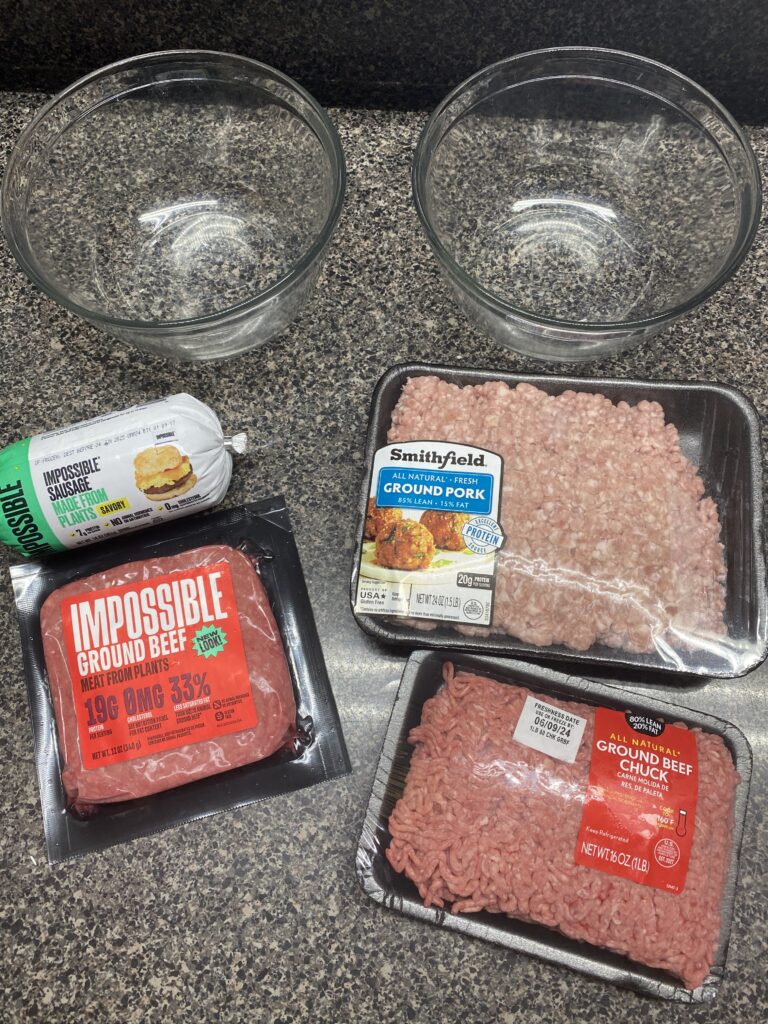
Once the dough has rested but before I start to make the wrappers, I mix the filling. I use my trusty kitchen scale to measure out a pound of protein, mix in a few chopped green onions, squeeze in some garlic and ginger paste, then add a bit of soy sauce, sesame oil, salt, corn starch, red pepper flakes, and an egg. It comes together super fast! When I started making these, I was on a mission to make a copycat recipe for that favorite permanently-closed takeout spot. Most of my recipe and technique is due to that goal. Because I wanted my filling to be darker like theirs, my standard recipe involves using half ground beef and half ground pork for the protein; but I’ve made them with all pork and all beef, and they’ve turned out great! Any ground protein should work just fine. The flavors of the filling are pretty powerful and would likely overtake the flavor of most proteins.
Recently, I experimented with using Impossible Beef and Impossible Sausage. I made a batch of Impossible Peking Ravioli alongside my standard half beef-half pork Peking Ravioli, and my family couldn’t tell the difference! I had them do a taste test where they knew one plate were the Impossible ravs and the other plate were the animal protein ravs (but they didn’t know which was which), and had them try to identify them. My husband was so certain that the Impossible Dumplings were the animal protein! I still can’t believe he guessed wrong, lol. I won’t forget that for a while!
I used an egg in the Impossible version (which acts as a binder) so that my experiment was controlled, and the only variation was animal vs Impossible protein, but these could likely be made totally vegan, using a bit more starch to act as a binder. I’ve already started to research potential vegan binders and will post an update when I find a good recipe.

Assembling the Dumplings
Once the filling is mixed, I get my dough out of the fridge and start making wrappers. I like to make only one or two wrappers at a time, so the dough doesn’t dry out. Once I have a wrapper prepared, I use a tablespoon measuring spoon to portion-scoop a level tablespoon of the filling and place in the center of the wrapper.
I use a “bi-drectional pleat” to fold the wrapper, and since the dough is so fresh and sticky, all I have to do is pinch them shut to seal. No egg wash, flour + water “glue”, or water bowl necessary! I will usually get the pleats in place and then pinch the length of the seam shut a couple more times to ensure each dumpling is completely closed. I like this method of folding because it most closely mirrors that restaurant I loved so much, but there are a bunch of folding methods you could use instead. I think this one is super easy with the homemade dough, and is in my opinion, the superior folding method.
The Dipping Sauce
The dipping sauce is another crucial component to Peking Ravioli! Savory-sweet with the tiniest mild kick, once you have this sauce you won’t want dumplings without it! When I eat these dumplings, I cut them in half and scoop-fill the dumpling cavity with the dipping sauce to get the most sauce possible as polite dinner-table manners will allow. My husband literally drinks it from the bowl! The ingredients include pantry staples, ingredients used in the recipe for the dumplings themselves, and one additional ingredient. It mixes up in an instant, and the only prep work is measuring. I’ve sometimes added a little snipped chives to really copycat that one restaurant, but the sauce works great without. I’ll whip up the sauce right before I start cooking the dumplings, so that I can dive right in as soon as they won’t burn my mouth (and sometimes before they’re cool enough!).
Cooking the Peking Ravioli
If and when you order Peking Ravioli, you will be asked “Pan-Fried or Steamed”. Heed this advice – ALWAYS CHOOSE PAN FRIED. It is worth the cholesterol and calories, please trust me. Compromise to benefit your health elsewhere. I steam and then pan fry these every time.
I usually use a stainless pan and 8″ double-decker bamboo steamer with precut circles of parchment to steam (though a metal steamer basket placed over the same wide pan with parchment worked in a pinch), and immediately pan-fry in a hot cast iron with olive oil. Six minutes in the steamer with consistently boiling water, and then another six-to-eight minutes in the cast iron over medium-low to medium heat or until desired golden-brownness is my ideal. You might prefer a different browning for your wrapper, but you’ll want to ensure your filling is cooked to 165°F for proper food safety.

Homemade Peking Ravioli (with Impossible version!)
Equipment
- 1 Bamboo Steamer
- 1 Cast Iron Skillet
- 1 Rolling Pin
- 1 set of measuring spoons
- 1 kitchen scale
- 1 meat thermometer
- 1 bench scraper
Ingredients
Wrapper Dough
- 11 oz all-purpose flour look for 10-11% protein content
- ½ tsp salt
- ⅔ cup warm water 115ºF
Filling (non-vegetarian version - USE ONLY ONE FILLING RECIPE)
- ½ lb ground beef
- ½ lb ground prok
- 1 tbsp ginger paste
- 1 tbsp garlic paste
- 5 scallions finely chopped
- 1 tbsp cornstarch
- 2 tsp sesame oil
- ½ tsp red pepper flakes
- ½ tsp salt
- 2 tbsp soy sauce 1 tbsp regular soy sauce, and 1 tbsp dark soy sauce, if you have it
- 1 egg
Filling (Impossible vegetarian version - USE ONLY ONE FILLING RECIPE)
- ½ lb Impossible Ground Beef
- ½ lb Impossible Savory Sausage
- 1 tbsp ginger paste
- 1 tbsp garlic paste
- 5 scallions
- 1½ tbsp cornstarch
- 2 tsp sesame oil
- ½ tsp red pepper flakes
- ½ tsp salt
- 2 tbsp soy sauce 1 tbsp regular soy sauce, and 1 tbsp dark soy sauce, if you have it
- 1 egg
Oil for Frying
- 2 tbsp olive oil
Dipping Sauce
- 2 tbsp light soy sauce
- 2 tbsp dark soy sauce sub light soy sauce if you don't have dark
- 1 tsp rice vinegar
- 1 tsp sesame oil
- ¼ tsp garlic powder
- ⅓ cup water
- 2 tsp white sugar
- 1 tbsp chopped chives optional
Instructions
Wrapper Dough
- Tip flour and salt into medium bowl, combine with whisk.
- Heat water to 115℉ (use an instant-read thermometer to gauge temperature), add to dry ingredients. Using your hands, combine to form a rough dough. It might seem like there's not enough water at this point - rest assured there is.
- Transfer dough to a clean surface (I use a large bamboo cutting board) and knead for about 5 minutes, incorporating any bits of flour left in the bowl. Dough should easily form into a ball, and be slightly tacky but not sticky.
- Place dough ball into a quart-size plastic zipper bag, seal shut, and rest in the fridge for at least an hour. This rest time allows the gluten to develop and will result in a much easier-to-manage dough. Near the end of the rest time and when you are ready to assemble the dumplings, mix the filling.
- With the dough rested and filling mixed, remove the dough from the fridge. Using your kitchen scale, measure your whole dough ball in grams and divide by 25 - this will give you an idea of how many dumplings you will be able to make. It should be about 19 dumplings.
- Cut your dough ball into quarters, and seal all but one of them back in the baggie. Cut a small amount of dough from the remaining quarter with a bench scraper. You're looking for a uniform size/weight of 25g for all of your dumpling wrappers, but also you want to ensure you're going to get the full amount of wrappers from your dough. You might need to cut your chunk smaller, or add a bit more from your dough. This might seem difficult at first but with practice it gets easier very quickly. Try to keep all of your dough except your "working dough" sealed in the baggie.
- Once you've got a 25g chunk of dough, roll it into a tight sphere, then flatten the sphere with the bottom of a pint glass. The glass I use in the video is a little shorter than a pint glass, but has the same footprint. I try to flatten the sphere to be exactly the diameter of the bottom of the glass.
- Using a handheld rolling pin, take your dough circle and roll it out to a 4" diameter. Start from the center of the dough and roll the pin towards you, then rotate the dough circle so that is flattens evenly. It's helpful at the stage to have a 4" circle template to measure your wrappers. I use a fried egg form, but you can substitute with anything you have lying around (a small bowl, a container lid, etc).
Filling
- Add all ingredients to a bowl and stir to combine. Easy af!
- The Impossible filling is a bit thinner/soupier than the animal protein filling at this point, which is why I increased the amount of corn starch for the Impossible version. Although the more liquid filling made it a little harder to shape and seal the wrappers, the final product was perfect!
Assembling
- Once you have your wrapper rolled out to a 4" circle, scoop a level 1T of filling into the center of the wrapper.
- Fold the dumpling wrapper in half like a taco, pinching it together in the middle at the top.
- Keeping one side of the wrapper flat, make a pleat with the other side, folding in an s-curve inward toward the center pinch spot. repeat once or twice more until you get to the fold. Repeat on the other side of the center pinch, again folding inward to the center. You should wind up with a relatively symmetrical dumpling.
- Arrange the assembled dumplings on a plate, seam side up, making sure they do not touch (they will stick together if they touch).
Cooking
- Line an 8" double-decker bamboo steamer with precut circles of parchment paper. Parchment is optional, but helps prevent sticking. If using a metal steamer, parchment is essential. Place bamboo steamer in a 12" diameter, 2-3" deep sauce pan. Add water to the pan, at a depth lower than the tray of the steamer. Bring water to a boil.
- Once the water is boiling, add dumplings to the steamer tray, allowing for extra room around the dumplings as they will puff up during steaming. Steam for about six minutes.
- While the dumplings are steaming, preheat a cast iron skillet on medium heat. Once pan is warm, add about 1-2 tbsp of olive oil to coat the bottom of the pan. As soon as the dumplings have finished steaming, transfer to the cast iron skillet. Brown for about another 6-7 minutes, turning occasionally, until your desired brownness is achieved.
Dipping Sauce
- Add all ingredients to a small bowl and whisk to combine.
